10 Easy Steps To Start A Blog
(Before you start, if you need help with this just scroll down to the bottom, type your message and I’ll reply within 24 hours 🙂 )
Have you ever considered the benefits of creating your own blog? It could honestly give you a new found sense of happiness, purpose and desire. Whether your passions lie with travel, writing, music, technology, art, entrepreneurship, or even photography, the possibilities to get your stuff out on the internet are endless! Keep reading to find my “10 easy steps to start a blog”.
I know a tonne of people that fund their travels through their blog. I also know a tonne of people that use blogs to help knowledge themselves in whichever area of life that may be. Blogs can be really interesting. They can be insightful, entertaining, resourceful and even poetic. Use your blog to express yourself, to show who you are – your stories, your passions, your desires. If you’re doing this because you love it, then you’re already winning.
NOTE: If you see a link on my page then its quite possible that I have an affiliation with that company. Essentially this means that I could possibly make money off my recommendations (from businesses that I personally use and trust) if you make purchases through their links – this is how one should start their journey to make a living from their blog, and it’s how I hope to one day make a living from what I love doing 🙂
Ok, so now what to do
I’m going to break this down for you in just 10 easy steps. It shouldn’t take more than 10 minutes. Just so you’re in the loop, this is what we’re going to run through;
Part 1. Signing up with BlueHost (web hosting company) and registering a domain (the domain is what your site/blog will be called – i.e. www.travelledmatt.com is my domain. www.google.com is Google’s domain)
Part 2. Accessing WordPress, Selecting a them and Editing your theme (WordPress is the tool which allows you to actually craft and construct your website – 25% of all sites on the internet are powered by WordPress)
NOTE – I’m going to use site/website/blog interchangeably here. A blog is something you run on your website. A lot of people get confused when they hear blog and site – just think of it as the same thing
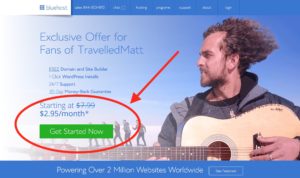
Just before we begin – why BlueHost?(another affiliate link) There are tonnes of web hosting companies out there. I chose BlueHost because they ticked most of the boxes for what I wanted to do. I wanted to build a website, create a blog, not pay too much money, have good customer service (24/7) and are very reliable. BlueHost best matched my criteria and so I stuck with them! They also power more than 2 million websites around the world so they’re very well known.
NOTE – I think it’s very important to find a web hosting company that partners up with WordPress, and BlueHost does. So that was another major positive for me!
Ok! Lets do this.
Time to follow these “10 Easy Steps To Start A Blog”
Part 1. Signing up with BlueHost and registering a domain
1.1. Get your domain and signup for BlueHost (web hosting company) here
In order to begin you need to click on the following link to get to BlueHost (web hosting company). If you use the links on this page you’ll receive a discount 🙂 It’s something I organised with BlueHost so it’s pretty cool. Normally web hosting costs $7.99 / month, but with my discount it’ll be $2.95 / month. ALSO it comes with a free domain!

Ok! So now you’re here. Click ‘get started now’ and I’ll meet you at the next step
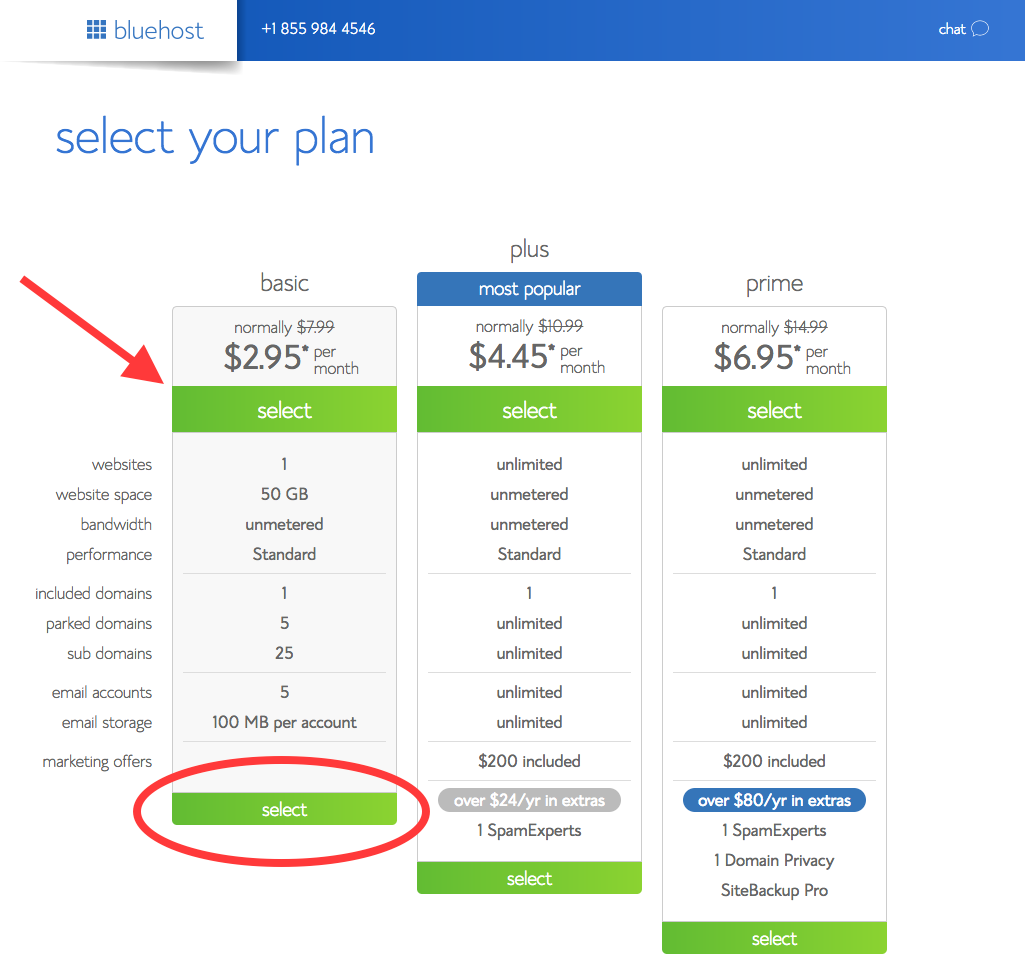
1.2. This is where you get to choose what time of web hosting plan you want. To be honest, if you choose basic, it’ll be perfect for the time being. You can always upgrade so never feel like you’re going to be missing out on something.
1.3. If you already have a domain, type it in on the right – but if you’re new to the game create one on the left. Be creative with this and also remember – THIS IS WHAT YOUR SITE WILL BE CALLED e.g. www.mynewsite.com. When you’re done, click next.
NOTE
– if you want to see if your domain name is available, use this box below and type in your desired url. A new window will appear telling you if it’s available. If so, you can close the window, return back to this screen and continue along 🙂 –

(Don’t yet have a domain? No problem – I actually wrote a blog on ‘How to Start Building a Blog WITHOUT a Domain. You can see it HERE)
1.4. Fun time – fill out all your personal information and then keep scrolling down

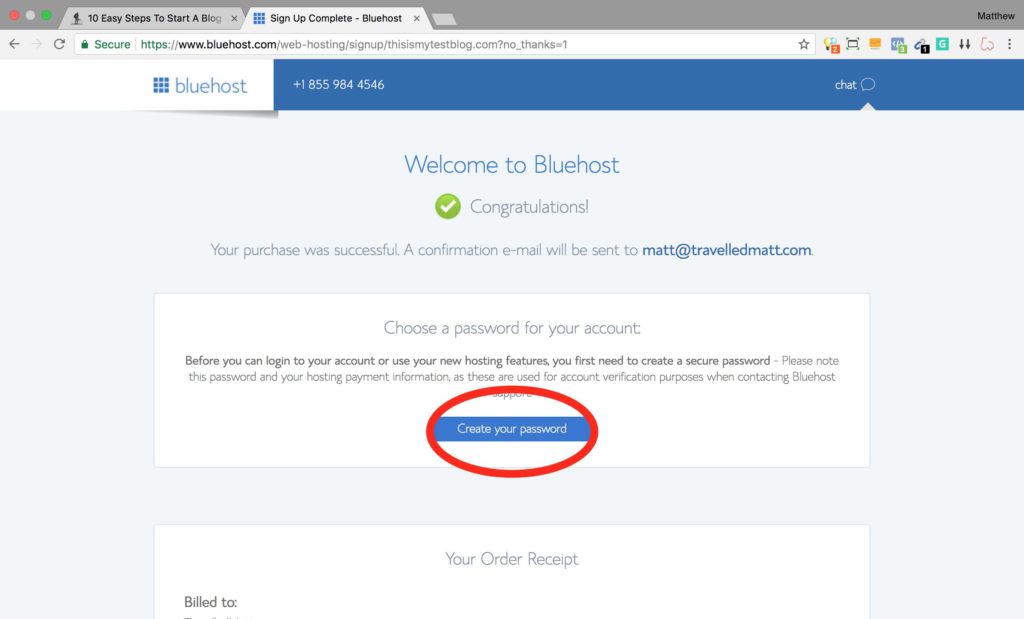
1.5. This is where you have to see how long you want to register your site for. I chose the 36 month option because I don’t plan on having my site just for one year (it’s also cheaper per month). Now for all the boxes underneath, I personally recommend just to set the ‘Domain Privacy Protection’. This will protect all your personal details. After you’ve scrolled down and added in your payment method you’ll be good to go! After that you will be prompted to create a password.


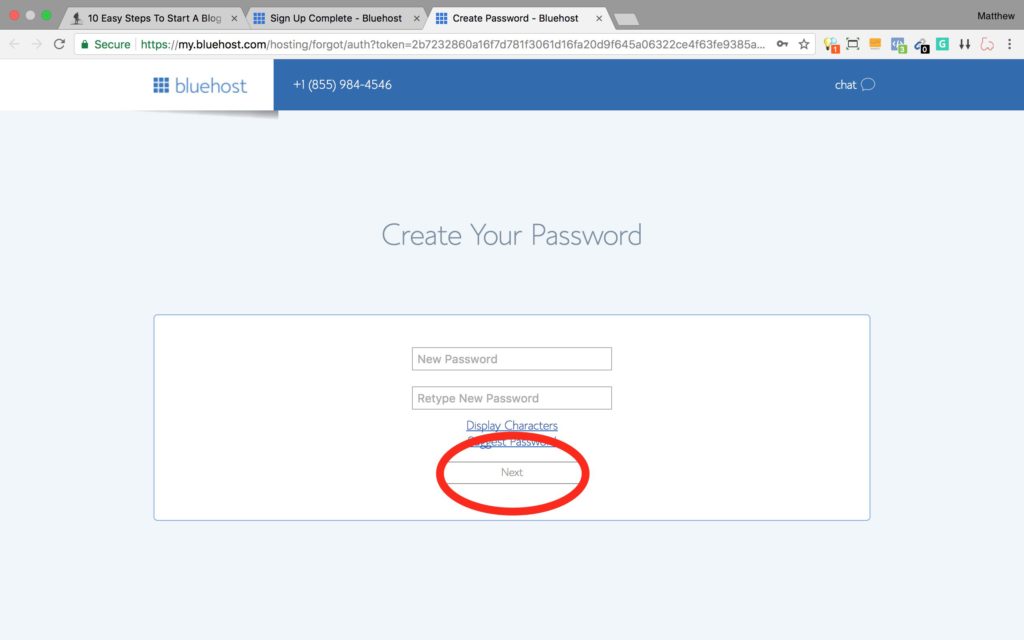
1.6 I’ll let you fill this part out and I’ll meet you a few screenshots below.
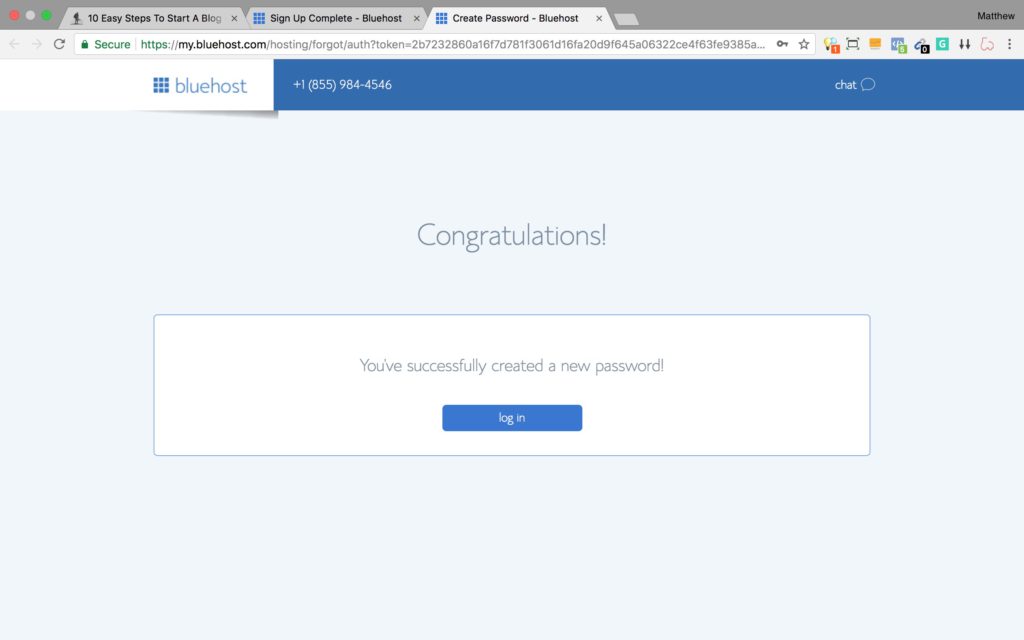
1.7 Yiewwww!!! Well done 🙂 You now officially own a website! Ok now lets make the fun stuff happen. Time to access WordPress.
NOTE: BlueHost should have sent you an email by now. Make sure you go into it and confirm your email before moving on.
Part 2. Accessing WordPress
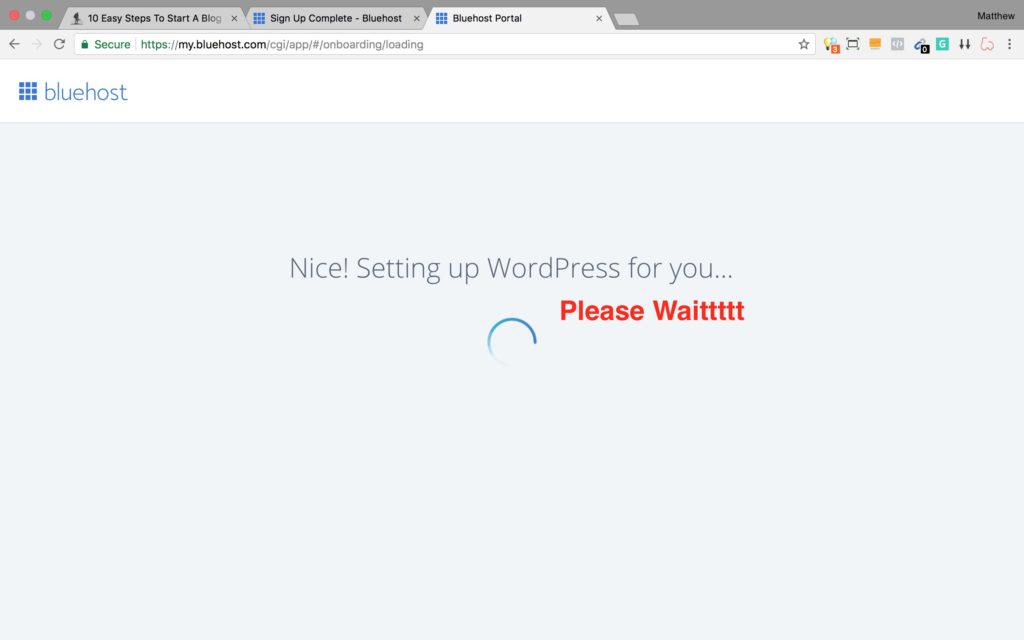
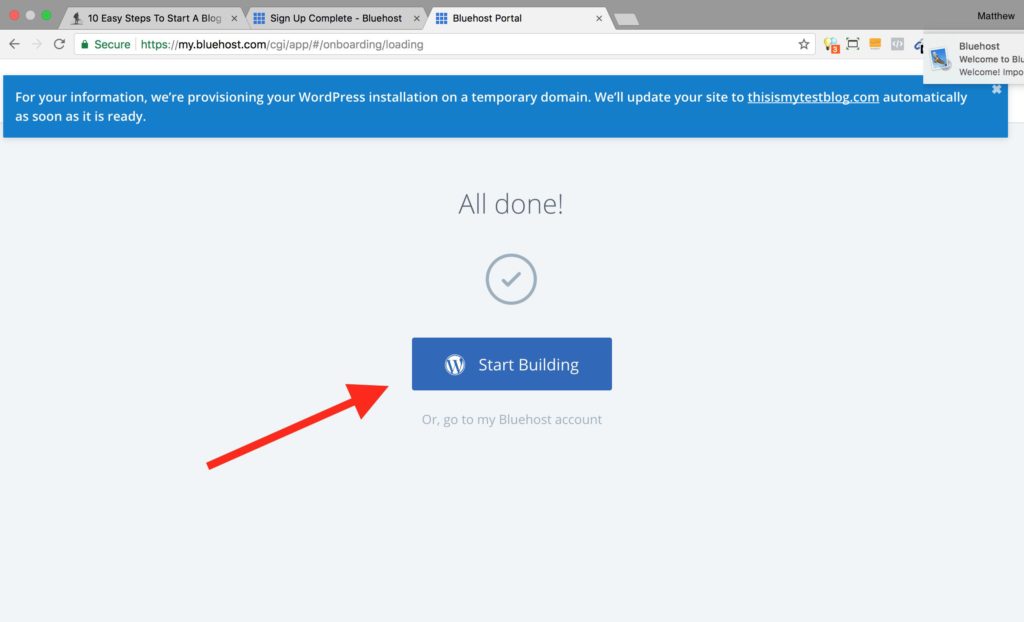
Ok, so for this next part you may have to wait a few minutes. Wait until it says “Start Building”. Once you click on it, you should be taken to your WordPress dashboard. If you get an error, simply press the ‘back’ button on your browser and wait a couple more minutes before trying again.

2.1. Ok! We’re in WordPress. This is the Dashboard and it’s from here that you’ll be able to select all the options from the left and make your blog look like a master piece!
Choose ‘I don’t need help’ – all options will eventually lead to the same thing.

Part 3. Selecting a theme on WordPress
So now we’re coming to an end. You’ve almost completed these “10 easy steps to start a blog”. Well done!
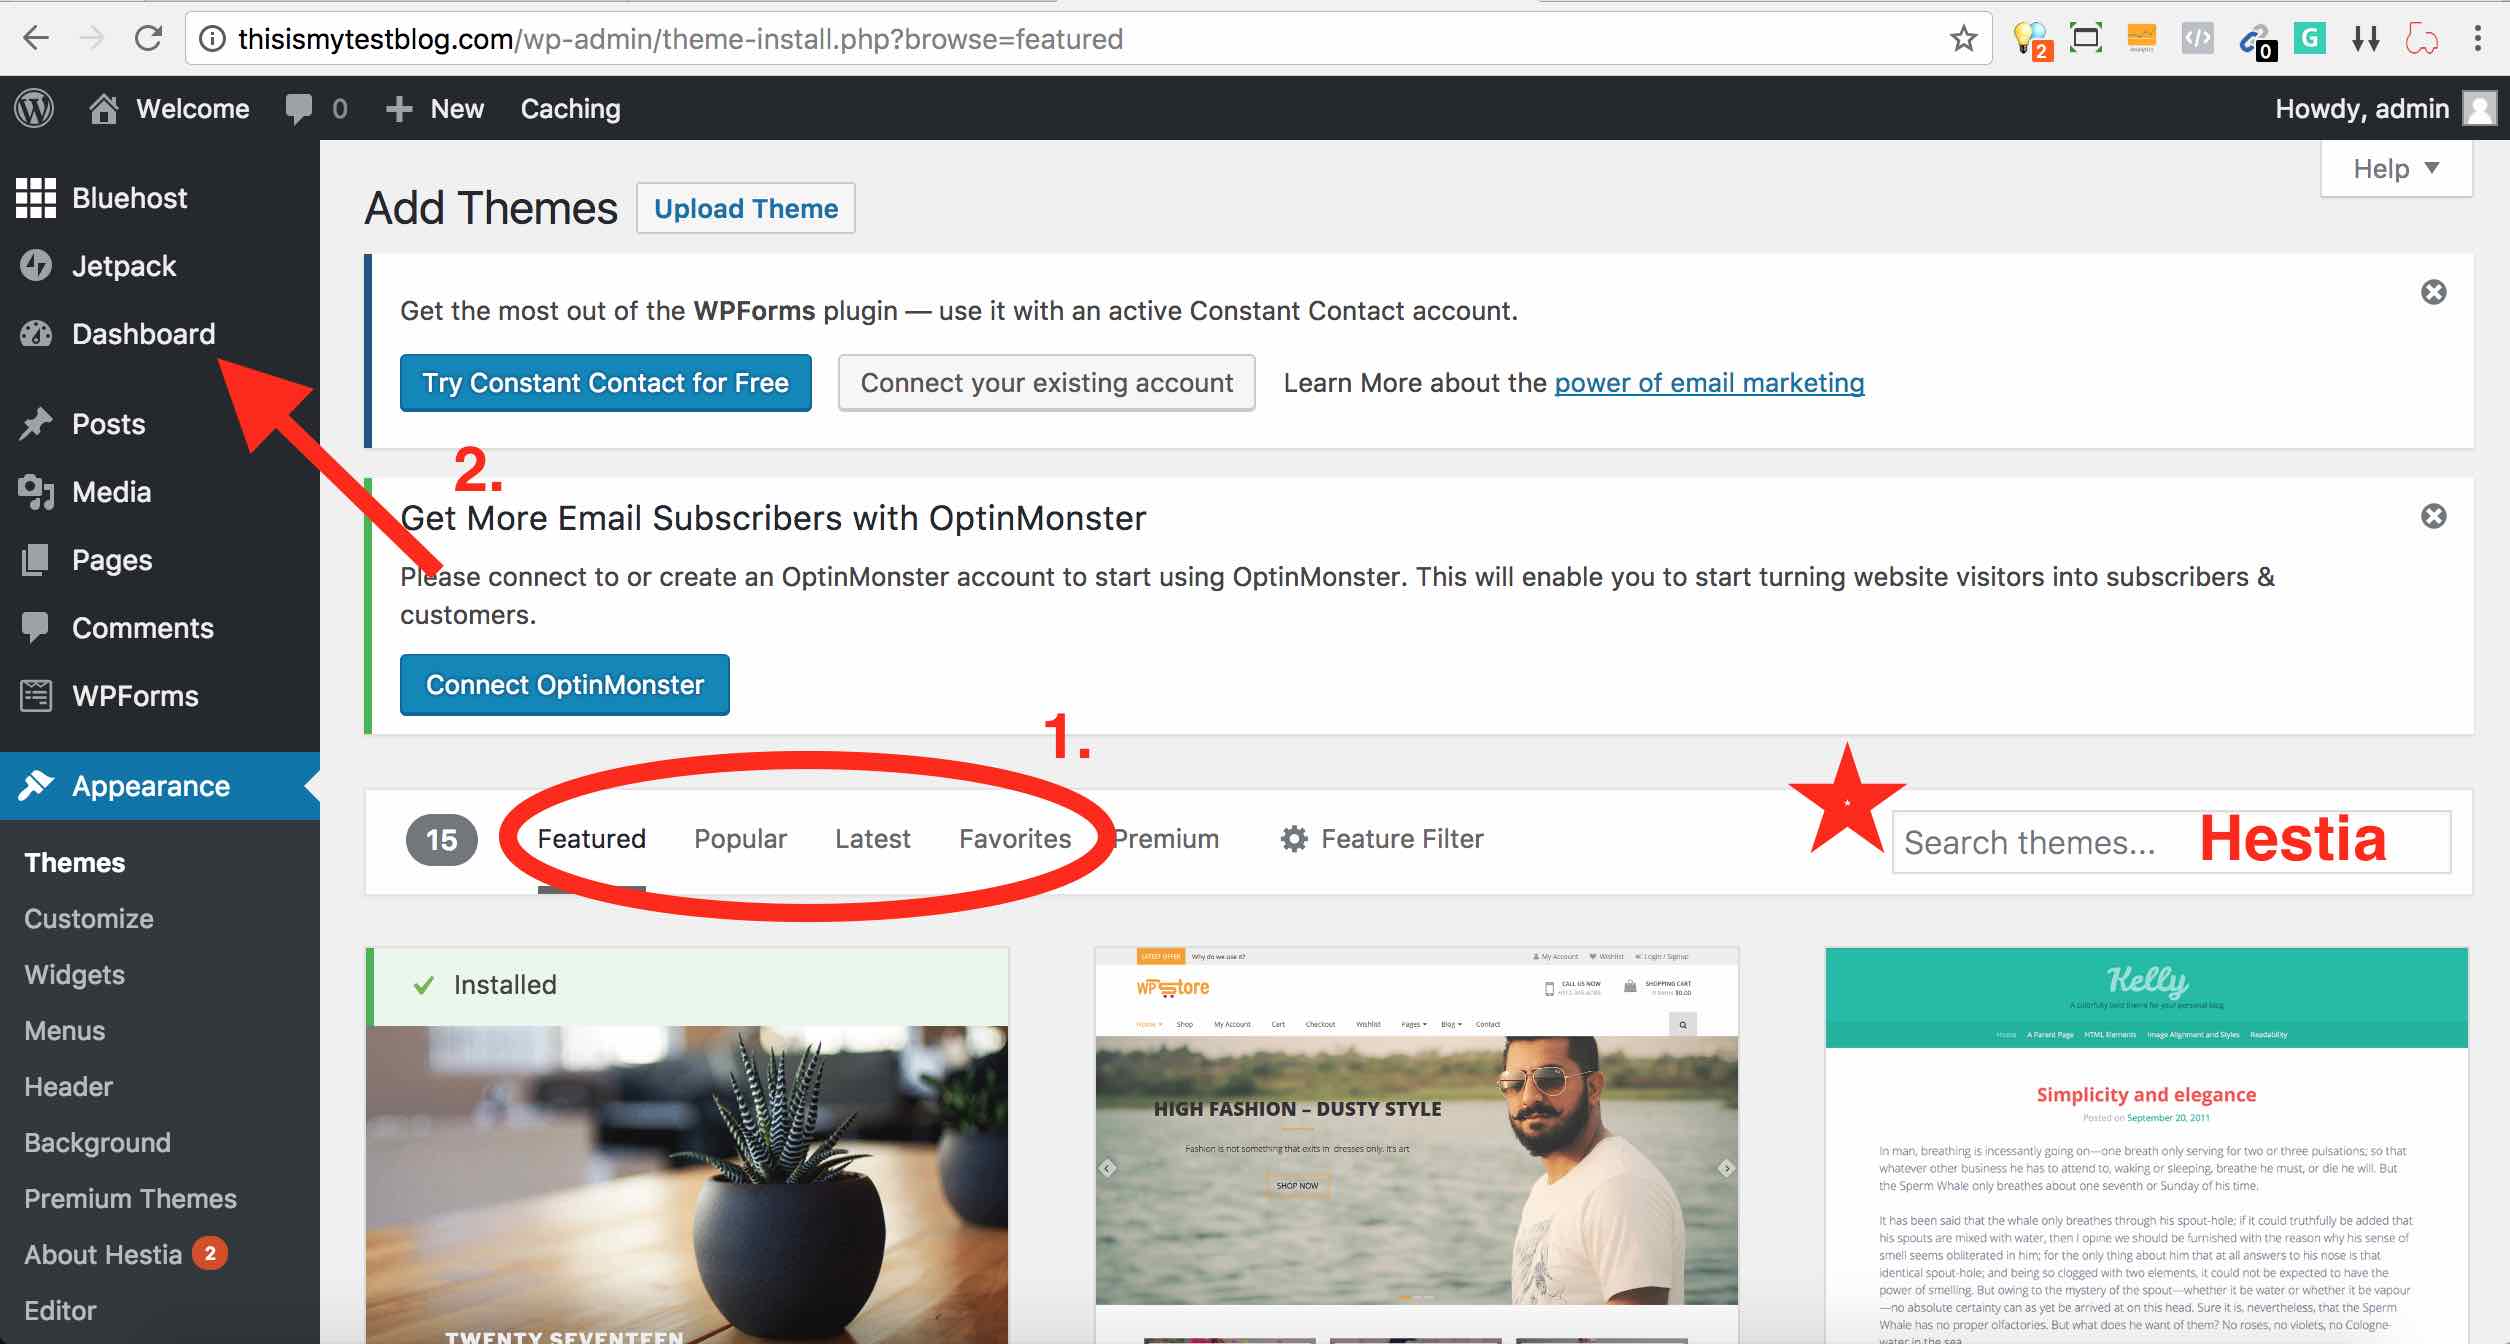
3.1. So now it’s time to select a theme! To do this, click on Appearance (on the left) you’ll get an option to either select a WordPress theme, or, upload as a .Zip file a pre-downloaded WordPress theme. WordPress actually have a tonne of free themes, which are great! You can definitely use those or if you feel like you want something with a little more zing to it then you can purchase a theme. I use a theme from Themify, called Ultra. It’s pretty cool and there’s lots of support out on it. You can do a drop and drag feature so it makes building your site quite easy. It is a paid theme, so you don’t have to get it, you can definitely work with some of WordPress’s free themes. If you interested in the one I have however, just click this link here and then purchase the one that you like most. Download it. And then upload it to WordPress (in the photo below)

3.2 Choosing a FREE WordPress theme – After pressing ‘WordPress.org Themes’ on the screenshot above, you’ll see the below window. You can either search through the categories that are circled, or use the one I chose for this example. Just search for it on the right, it’s called “Hestia”. After you’ve chosen and activated your theme, press Dashboard (On the left where it says ‘2.’)
Part 4. Editing a WordPress Theme
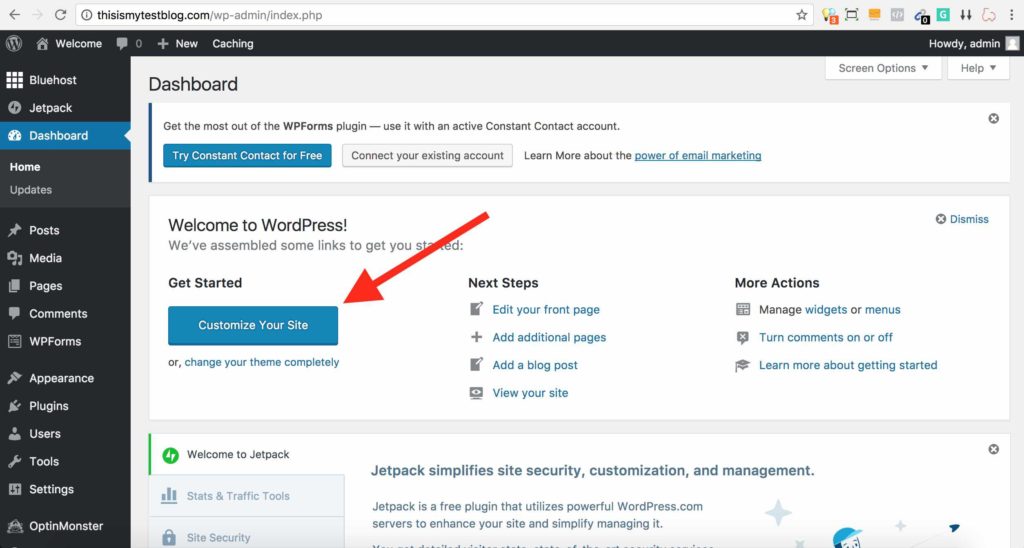
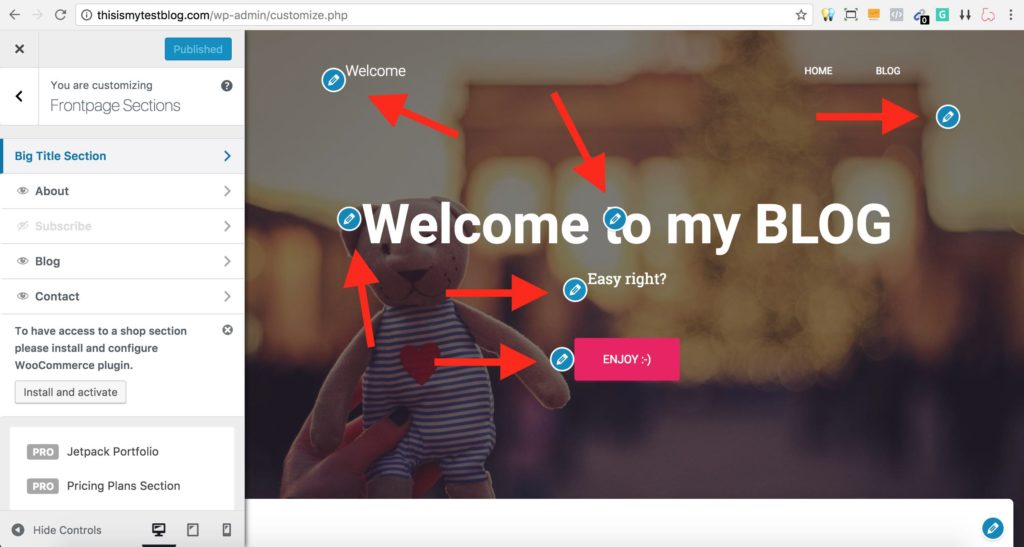
4.1. It’s actually really easy to start building your blog and editing your theme. I’ll add three screenshots below. Just press ‘Customize Your Site’, choose the area you want to edit, then make the changes.

FINISHED!!
Well that is it!! Congratulations! On completing these “10 easy steps to start a blog”. You’ve successfully created your own blog / site AND you have a means of developing it. One last thing before I go – I’ll give you a list of 8 highly recommended Plugins to use for your blog. These are all free and work really well for keeping your blog healthy/functional.
1. Akismet – This will help to protect your blog from scam
2. Contact Form 7 – A means which your readers can contact you. You can link this form to your email address
3. Google Analytics Dashboard for WP – This will give you real-time statistics on how your site has been performing. How many people visit it, how long they spend there, where they’re from etc
4. Instagram Feed – You can use this widget to put your Instagram feed on your blog!
5. MailChimp for WordPress – Great for gaining subscribers, collecting emails and building a database.
6. Pretty Link Lite – This allows you to track clicks on your blog and also shorten the affiliate links you use
7. Ultimate Social Media PLUS – Great widget for putting social media share and like buttons on your site
8. Updraft PLUS – Use this is back-up and restore your site
I hope I’ve helped you get a step closer to achieving your dreams of creating a blog / website. I wish you all the best on your endeavours and please do not hesitate to ask me for help along the way.
Need Help??
It can get a little overwhelming setting all this up, but the end result is great. Just contact me HERE and I’ll be sure to help out 🙂
OR
simply just type your message here and I’ll get back to you within 24 hours!
Thank you for reading these “10 easy steps to start a blog”
Happy blogging!